Pottery Barn Throw Blanket…For Less!

Pottery Barn Blanket

I recently went shopping, and died over Pottery Barn’s new holiday decor. Between their fall decor and the upcoming Christmas decor(found in their catalog), I could definitely spend hundreds of dollars there very quick. I especially loved their faux fur throw pillows and throw blankets. They look so delicious and perfect. Very cozy for those cold winter days. Unfortunately, the throw blanket I really wanted cost $129. That was a little too pricey for my taste. So I left the store empty handed. I then strolled into Target (my home away from home). I went straight to the home section (obvi) and what did I find?! A faux fur white blanket on sale for $13.99!!!! What a steal!! This is what I love. Finding things that I love at the more high end stores, and then scouting around to find them on the cheap! So now, I get the look I want, my boyfriend doesn’t think I’m crazy for spending $129 on a blanket, AND I have $100 more dollars to spend on something else! (Like the Pottery Barn fur pillows to match!). Target is the BEST! If you ever want the look of Pottery Barn but can’t spend that much money, always look at stores like Target, Home Goods, or Ikea. They have great deals, and when you mix high priced and low priced items, no one knows the difference! I like to spend more money on certain things, and then save money on other accessories. For example, I discovered that the cheapest pillow inserts are found at Ikea. They are like $3.00! And then you can buy the Pottery Barn or West Elm pillow covers for $30-$40 and not feel bad about it. Instead of spending $12-$18 on a pillow insert PLUS $30-$40 on a pillow cover at Pottery Barn, you just saved that extra $12-$18 and no one will ever know the difference! That’s almost enough for another pillow cover! It’s all about the mix and match. My tip is never buy things on a whim. Figure out what you want and then shop around to find the best price you can on that item. I always scout out the stores, write down what I want, and then go home and online shop to see if I can find similar things for a better price.

So here it is — the blanket I based my purchase at Target off of:  Faux Fur Throw from Pottery Barn    How luxe is that?!

Pottery Barn Blanket

I couldn’t find the Target throw blanket I bought online, but here is a picture of the info tag 🙂

20140923-182557.jpg

Doesn’t that look the same?! So flurry and furry!

So what do you think? Are you always searching for a sweet deal like I am?! Leave me a comment and let me know!

xoxo

Image courtesy of http://www.polyvore.com


Advertisement

Decorating Inspiration!

After my re-decorating binge yesterday, I found myself doing some inspiration searching online today. So in case you are needing some inspiration to get your home remodel started… check out these fab finds!

First off, This Bed! This is the sickest bed I have seen in a while. Brass is coming back, and I’m digging it. To me, this bed would only work if you have a dark room to make it stand out. Picture deep purples and blues, a gorgeous charcoal, or a royal emerald, with touches of gold and velvet that pop and make the room seem luxe. Love Love Love!

Next topic: TRAYS! Trays are fabulous because they make a plain, empty space seemed planned out and decorated. I personally have a white tray in my living room, and a mirrored tray in my bedroom. I’m also hoping to add a small gold tray to my new office desk! 🙂

As an example, here are what my trays look like these days.

IMG_3489 IMG_3490

The best part of trays is that you can change them based on events, holidays, etc. I didn’t have some flowers at one point, and so I filled the tray with candles. For Christmas, I filled a glass bowl with sparkly pinecones.

IMG_0018IMG_0367

As you can see, there are a lot of things you can do with trays!

Here are some of my favorite trays: West Elm – Copper Tray  CB2 – White Tray  West Elm – Blue Mirrored Glass Tray

Just for fun, here are some other cute accessories I’m currently obsessed with(can you tell I’m into gold right now?!):  CB2 Vases  and CB2 Dahlia Candleholders

And last but not least, check out Target this week — they have up to 25% off their home goods/furniture right now!! Get shopping!!

So what do you think?! Are you inspired to get decorating?! Let me know!

xoxo


DIY: Guest Room/Home Office Remodel!

As I’ve mentioned before, I live in a tiny, not so great apartment. Slowly, I have tried to make each room look as good as I can with what I have to work with. Since my boyfriend and I rent, I cannot change the wall colors, or replace the disgusting old carpet with hard wood. But what I CAN do is re-decorate to take your eyes away from the lame floors, etc. This summer, I have been getting inspired by seeing a lot of bloggers home offices online. They all looked so cute! So then I decided…I want a home office! But where would I put it? I don’t have a mansion with extra rooms just waiting for ideas. But I did have a spare bedroom that we basically used for storage. It had turned into my closet/junk room. And so, my remodel of the spare room began.

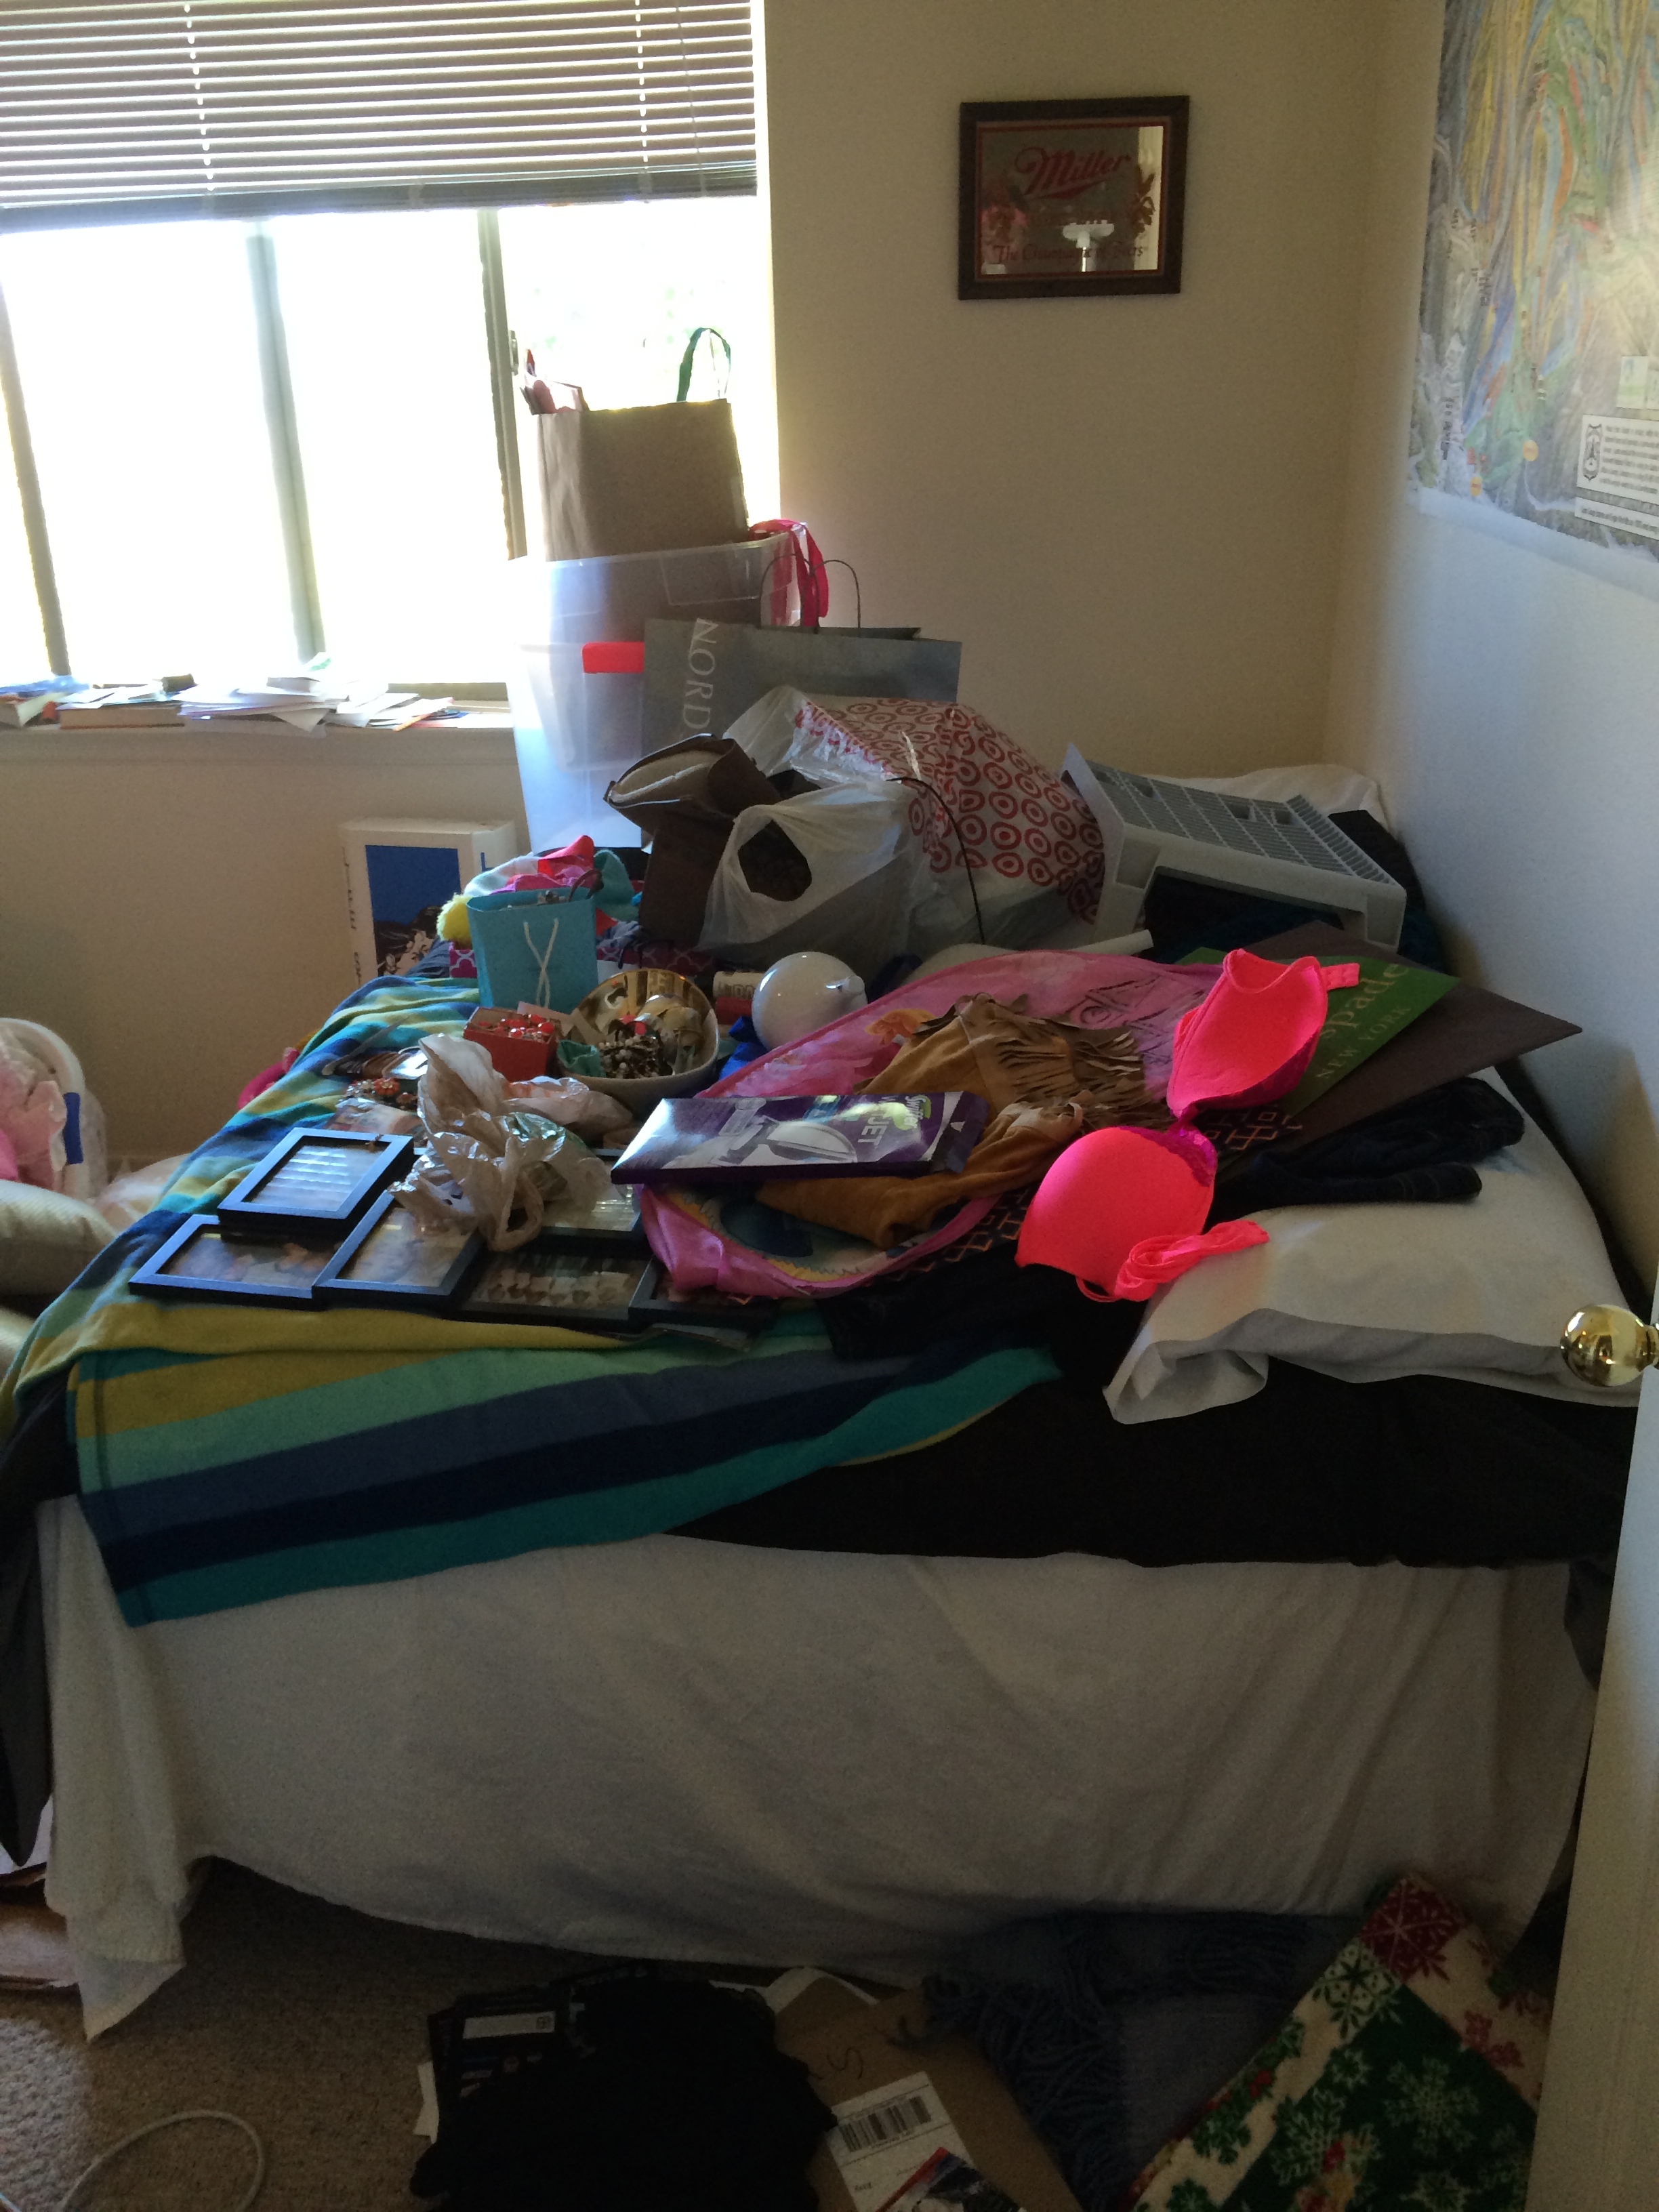
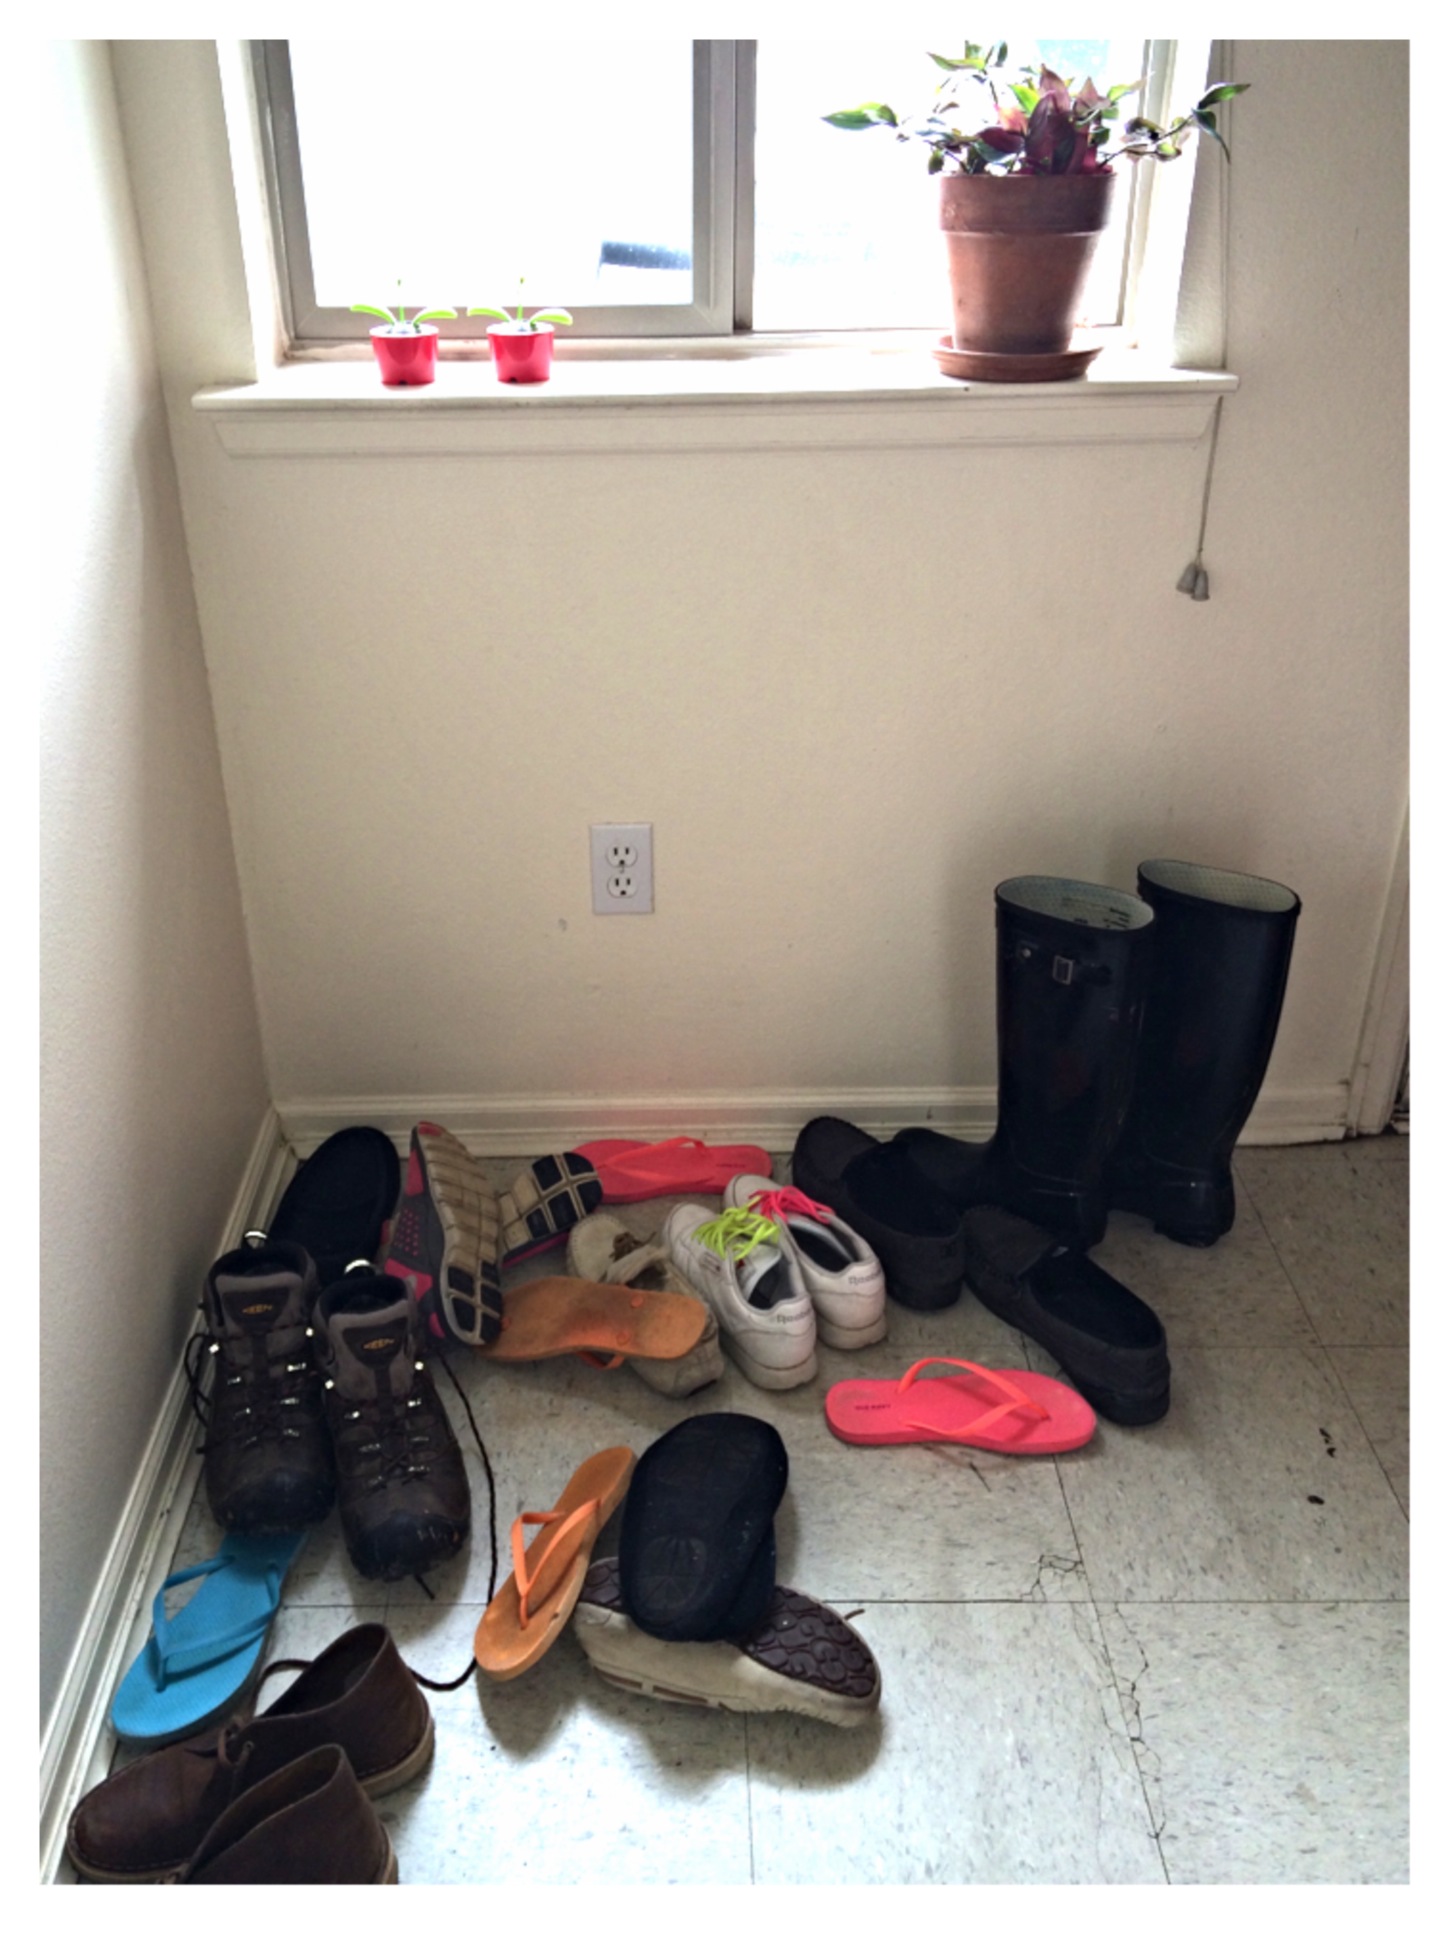
Here is what our spare bedroom looked like before I started – the bed was covered in clothes, jewelry, and randomness. The floors had an overload of holiday pillows, shoes, and bags strewn around that I had no place to store. I had built a desk about two weeks ago(more info below), but that was as far as I got in the project. As you can see, the blue plastic was still on the white desk to keep it from getting scratched!

IMG_3433 IMG_3434 IMG_3437


First step in the remodel was simple: Organize! Before I could do the fun stuff (aka decorating), I had to organize my life. I re-worked my closet, and found places for all my jewelry and clothes. It really wasn’t hard, it just took some time.

Second step was hanging up the curtains. All you need for this project is a drill (screw gun), drill bits, and screws. I bought my curtain rod and attachments from Ikea for super cheap. If you are using the Ikea set up, I would suggest having a friend or Mom help you. It goes faster. Ikea curtain rods are not at all hard to set up, the directions are pretty straight forward. To check out Ikea curtains, Click Here And Here!

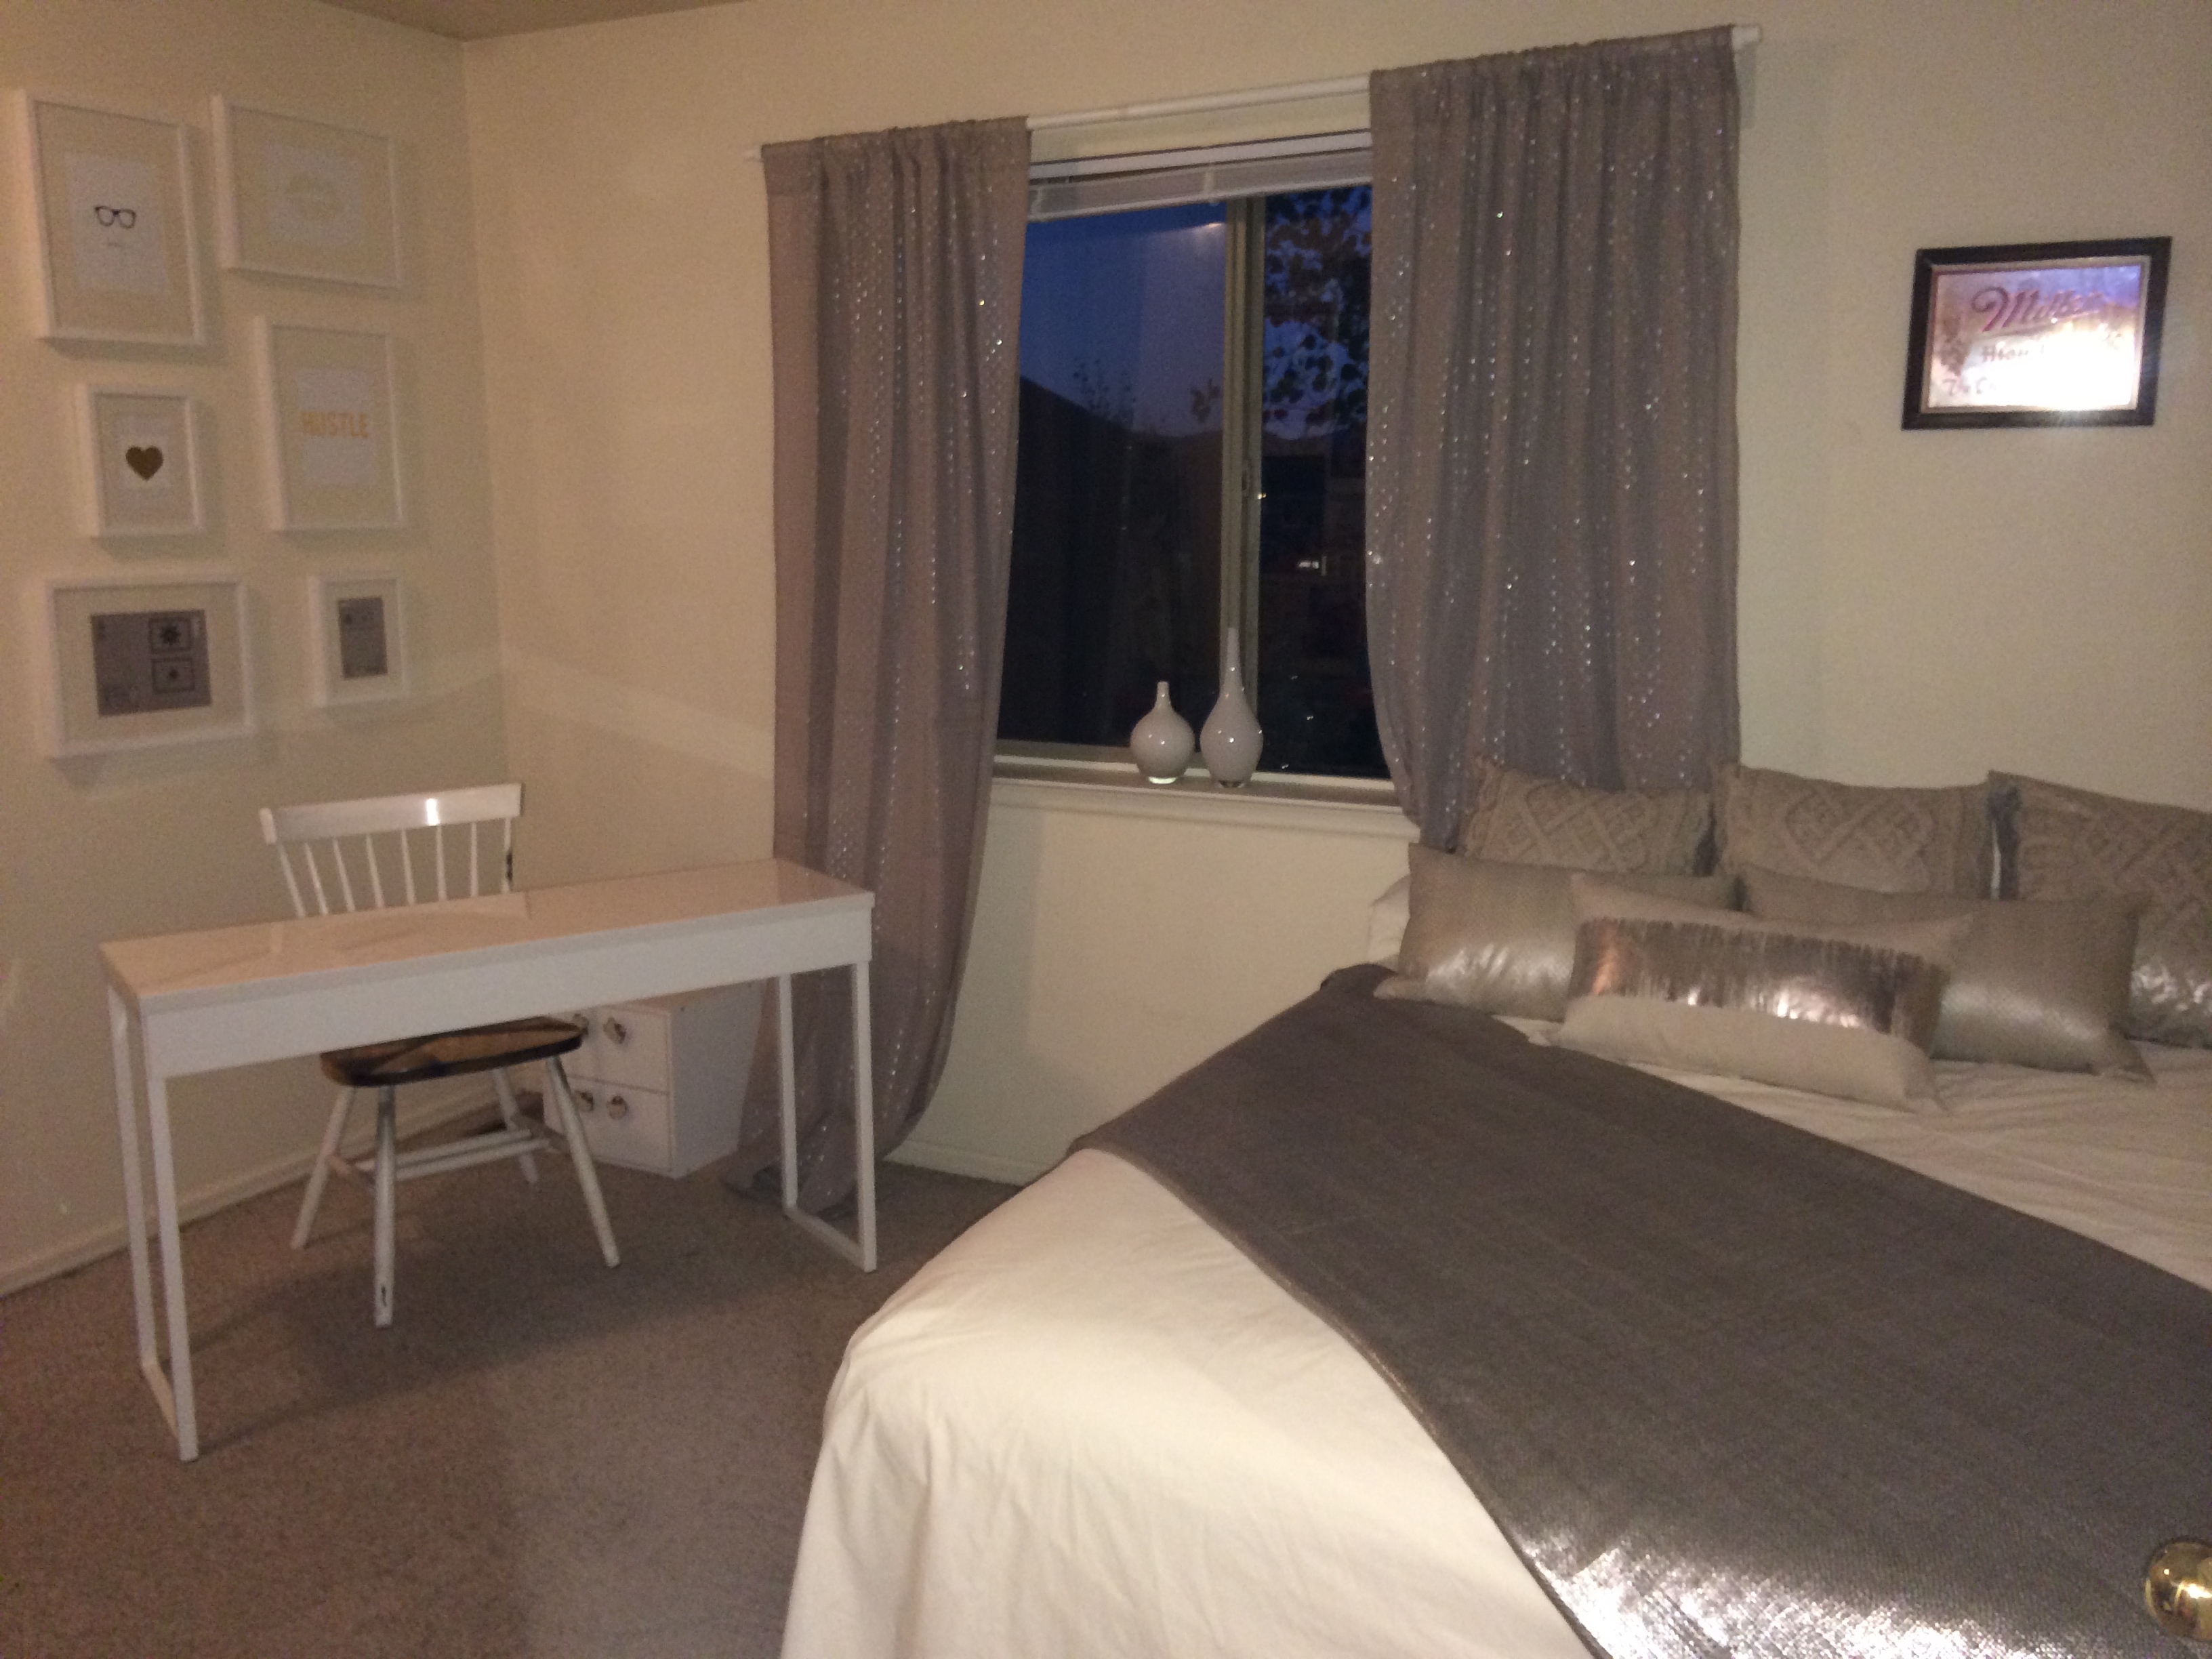
Here is the finished room!!

IMG_3466

How pretty is that?! It’s exactly how I imagined it. Disregard the chair, that will be another post. I need to make it super glam, but for now the chair will have to do. You can see black paint on it from other DIY projects I have done. It is what I refer to as my “Craft Chair” haha 🙂 To purchase the shiny white desk I bought, it can be found at Ikea here. The price is slightly high, but I purchased it when they were having a summer sale. A good rule of thumb for buying new decor pieces is figure out what you want, then wait a month to buy it. Within that month, there will usually be some sort of sale. I have found that if I troll the internet and my emails for discounts, I am usually able to find some sort of savings for what I want. One time that this is not a good idea, is when you know the product is going to sell out. If you are in love with the product, and think it won’t be there in a month, then buy it. You can always return it, and you will usually regret it if you don’t.

P.S. A small note on the Ikea desk – in true Ikea fashion, it took me about 3 and a half hours to build. Annoying at the time, but once it was built I felt a huge sense of accomplishment. So don’t let Ikea and it’s long building times scare you…you can do it!!

Here are the details of every part of the room:

IMG_3469


Pillows: West Elm – These particular silver pillows I purchased around last Christmas, so they are no longer in stock. But not to worry! They are always changing their inventory, and right now they have some GREAT pillows! I especially like this Velvet Pillow because it’s so in for fall right now. West Elm’s pillows normally run around $39 a pillow, which adds up quickly. But as you can see, they are SO worth it. I wanted a glam look, and these pillows delivered. West Elm has a lot of good sales too, so get on their mailing list and you will be happy you did! Everything I have bought at their store I have purchased while they had a promotion going. Keep your eyes open, and you will be rewarded!

Throw Blanket: West Elm – This is currently out of stock as well, but check out their West Elm Throw Blankets page, and I’m sure you will find something you love! You cannot tell in the picture, but in person it is metallic and very shimmery. It looks awesome!


IMG_3470


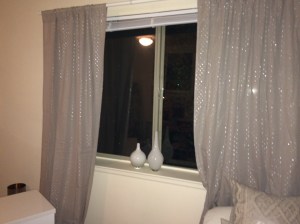
Curtains: West Elm – Can you tell I am OBSESSED with West Elm?! haha It’s a problem! These curtains were perfect because they are pretty sheer (you can’t tell in the picture because I took it at night time), so they let a lot of light in. I also love them because they have little specks of silver sparkles in them that glimmer in the light. Check out these curtains here: Metallic Dash Curtains And BONUS! They are on sale right now!!

Vases In Window: These cute white vases are from Ikea. I liked them because they are small and understated but are able to be a design piece on their own, or I could add a single flower to them and they could be vases. #MultiFunctional. Check these vases out HERE and HERE! I love getting home accessories at Ikea because they are so well priced. It is always a win!

IMG_3472

Picture Wall: All these white frames were purchased at Ikea. After many searches at different stores, I have found that Ikea has the best prices when it comes to picture frames. You can check out their frame selection here: Ikea Picture Frames

The prints in the pictures came from a variety of sources. Some were purchased through Etsy, and one of the prints my mom made for me. As you can see, the bottom two frames actually have not been replaced with real prints yet. I hung up the frames anyway so that I could get the overall look I wanted. The prints will be coming soon!!

So overall, this who remodel took me about a day. I had to re-organize, build a desk, and re-decorate the room. I think it was well worth it, I am loving the outcome!! I hope this post reminds you that you CAN live in a fabulous home, no matter how big or small. All you have to do is have a vision, and make it come to life!

Have you ever imagined a new room, and made it happen?! Let me know!!

xoxo

DIY: Glam Dresser!

Today’s post is a DIY post. I love doing these posts because I want to show you that it is SO possible to make things yourself! DIY crafts are an easy way to get the exact thing you want, while saving money!

For years, I have had a pair of nightstands that are mirrored. I have always pictured my bedroom as this glam space that would be all mirrored and perfect. But the reality of it was that I had a bed, and 2 mirrored nightstands. Not that much excitement. Now that I live with my boyfriend, I’ve been trying to make each room in the apartment a nice, decorated living space that we like to spend time in. I discovered this dresser while online shopping, and thought it would be perfect for our glam bedroom look, but knew that the price tag was a bit too hefty for our budget.

Screen Shot 2014-08-27 at 8.46.26 PM


So I decided to do a DIY project! I knew I could make a dresser that would look similar, with almost no cost.

Things You Need: a dresser (preferably used), silver spray paint, crystal knobs

So first, you need a dresser. I actually found this dresser at my parent’s house. It was not being used, and my mom was happy to let me take it for my project (She’s trying to de-clutterize their life, now that all us kids have moved out!) . If you don’t have parents that want to give things away, check out your local thrift shops, or garage sales. The whole point of these projects is to be super cheap and save money. So don’t pay crazy amounts of money for a piece of furniture that you are going to re-paint.  I would say that a budget for a dresser is $20. Here is what the dresser looked like when I started: It was the boring wood color that I hate.

IMG_2133 IMG_2160


To get it ready for the spray paint, I sanded the top with a hand sander. If you have a hand sander, then go for it. Mostly it just needs sanding on the top. If you don’t have a hand sander, then just sand it with pieces of sandpaper and don’t worry too much. You could go with the vintage/retro look. The next step is to spray paint it whatever color you want. I picked silver. Then let it sit and dry. I spray painted this with silver for two coats. I let it dry between each coat, then sprayed it with a shiny top coat after both coats had dried. I didn’t feel like the top coat really did anything, so I would suggest not wasting money on that step unless you really feel like it will make a difference. Here is the finished product:

IMG_3320


So what do you think?! Does it not look JUST like the glam dresser that I found online?!!? I took off the ugly wooden pulls that were originally on the dresser, and I installed the crystal pulls. I found these crystal pulls at Target, for a very good price. I paid $25 total for all spray paint/sand paper/crystal knobs, and the dresser online was originally priced at $562. That is a HUGE savings! I personally think DIY is the way to go. I know for someone who doesn’t do DIY, it’s hard to comprehend….but it really is a great thing. You CAN make things yourself! It’s not as hard as it seems. A lot of DIY projects are just a can of spray paint and some  love.

Let me know what you think!? Will you do this DIY project?!

xoxo


DIY Flower Arrangements

I’ve been scouting out fake flowers for a while. I have some brightly colored fake flowers from Ikea that sound cheesy but are actually super cute for a pop of color in the family room. But I’ve always pictured nice white bouquets in a few vases I have laying around. I wish I could buy fresh flowers every week like some people, but that can be super expensive. And the flowers at our local grocery store are usually dead by the time they get up here, so it’s really not worth it. The issue with fake flowers is that they can look super fake and lame (duh) if they aren’t good quality. Enter Pottery Barn. I became obsessed with Pottery Barn fakies about 4 months ago, and finally hit up a store to see if they really looked as good in person as they did online. They did. They were magical. I HAD to have them. So I bought 3 fakiez from Pottery Barn, and then 5 fakiez from Michaels (way cheaper). Mixing high and low costs leads to perfect arrangements. 🙂

Can you tell which is $12.50 and which is $4.99??

IMG_2005 IMG_2006


Making fake flower arrangements is very simple. Grab your vases, and let’s get going!

IMG_2004

( It was a dreary day today, I needed a fun activity.)

For me, the fakiez I got were too long (see below pic), so I needed to cut them. Trimming fake flowers is a little obnoxious because the insides of them are wire and cardboard and plastic and all these weird things. You definitely have to cut, pry and work at it, but they will eventually break off. It just might take a little bit of strength and will power. 🙂

IMG_2007 IMG_2008


And that’s all you have to do! Here is my finished product! Now, they are not completely finished because I need to buy more clear marbles or something to put in the bottoms of them – but you get the idea! Super fab right?! And they will look perfect every single day!

IMG_2009


To purchase these fake flowers – check out http://www.potterybarn.com or http://www.michaels.com. I just bought these flowers within this week, and both stores were having sales – so the time to buy is now!

The bouquet on the left is all Michaels flowers – $4.99 each, I bought 5 of them. They were on sale for $2.99 each that day – so total cost was $15. The bouquet on the right is all Pottery Barn flowers (gorg!) – $12.50 each, I bought 3 of them. They were on sale for $10 – so total cost was $30. I had a coupon as well, so my total cost ended up in the $20s ..I think it was about $24.

Some people might think spending $10 a pop on a fake flower is insane, but I just think the quality is SO legit that it’s worth it. And realistically if you average out the cost of fake flowers over the year or two that you will have them – it equals close to nothing.

So those are my new flower arrangements! What do you think?!

xoxo


Entryway DIY Makeover

As you all know, I live with my boyfriend in a not-so-great apartment. I have been trying slowly but surely to fix up everything so that we are living in a clean, nice, happy space!

We have a window right by the door everyone comes in, and the small space became our shoe spot. It might have been okay if it was a mud room, but it’s not. And of course, it seemed like an okay idea in the begining, but turned into a jumbled mess. Because really…who wants to straighten up the shoes every day.

IMG_1965


So I decided to switch it up. I found a storage bench at Target that was too cute. And then found some summery pillows (at Target as well), which seemed to the complete the look. I also bought little decorative bowls from Target to put the dancing flowers in. Okay – as I just typed this out, I realized that the entire makeover was furnished by Target haha. Oh well – I LOVE TARGET!! What can I say!!

Here is the finished look – what do you think?! My goal is to also paint the potted plant (I hate that plant, but my boyfriend loves it). I think I will paint it in bright colors to really pop.

IMG_1966


This whole little nook was only $125. The storage bench is on sale for $79.99 this week at Target, the pillows are on sale for $20, and the little bowls were like $5. And this is why I love Target.

DIY Liquor Cabinet

Do you ever see those Home Decor DIY sections on HGTV and think there is no way I can do that. Well guess what! You CAN! My parents love DIY projects (especially my Mom), so I have grown up always looking at things and thinking about how I could change them. What people usually don’t realize is most DIY projects are super easy. Here is a DIY project that I did this year that took about 20 minutes. The results were fab.

I’ve been living with my boyfriend for over a year now. I moved into the apartment he had lived in for the last 7 years.   Needless to say, it was very dirty and manly. Old posters on the walls from his childhood, dirt caked to every floor board, and beyond stained carpet. I have tried my best to clean it to a normal living standard, but some days I just wish I could live in a brand new house that is all clean and has bright white molding. But ANYWAY,  I have slowly started decorating the apartment and trying to make it look nice. My first step was making this liquor/drink cabinet. We had run out of room for all of my fun drinking glasses, so I decided to take matters into my own hands. Here’s how:

Supplies:

Shelf/Cabinet

Black Acrylic Spray Paint

First, find an old cabinet/shelving unit. It could be one you already have that is just really outdated, or you can go scouting at a thrift store or garage sale. Don’t spend over $10. This should be really cheap. Free or $2 would be my goal. I actually got this shelf from my parent’s house. They were getting rid of it. It came at just the right time.

IMG_0144

Next, take the shelving unit outside. You do NOT want to get spray paint all over your house. The fumes alone would be really bad for you. So take it outside to a place you don’t care if gets ruined with paint. I placed my shelf on an old chair on the front stoop that I didn’t mind if it got paint on it. You could also put a tarp down on the ground underneath your work station if you don’t want paint to get on your grass/sidewalk/etc.

IMG_0726


Spray the shelf with your spray paint. Make sure you hold the can slightly away from the shelf so it applies perfectly and not too gloppy.

IMG_0725


Let the first coat dry for about 30 minutes to an hour. I get ancy and usually can only wait 30 minutes. Then spray another coat of paint. Make sure that every surface is covered and even. Let the shelf/cabinet dry for at least 2 hours outside before bringing it into your home. Wet paint is a major mess if it get’s where you don’t want it to.

TADA!! How shiny and fabulous is this?!?!

IMG_0734


The final product turned out exactly how I was hoping it would. I fit perfectly in the corner and I was able to display all my glasses.


IMG_0735


What do you think?! Would you try this DIY project??

xoxo ❤